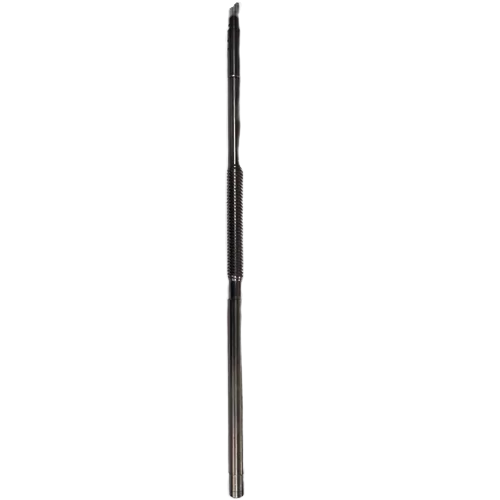
Optical instruments play a crucial role in various industries, including aerospace, automotive, and medical fields. These instruments often rely on internal drive shafts to ensure precise movement and functionality. In this blog post, we will explore the manufacturing process of optical instrument internal drive shafts, including the materials used, the production methods, and the quality control measures employed to ensure the highest standards of performance and reliability.
Materials Used in Manufacturing Internal Drive Shafts
The manufacturing of internal drive shafts for optical instruments begins with the selection of high-quality materials. Common materials used in the production of drive shafts include stainless steel, aluminum, and titanium. These materials are chosen for their strength, durability, and resistance to corrosion, which are essential properties for components that operate within precision instruments.
The selection of the appropriate material is crucial to ensure that the drive shaft can withstand the demands of the application while maintaining dimensional stability and performance over time. Manufacturers carefully consider the specific requirements of the optical instrument and the environmental conditions in which it will operate when choosing the material for the drive shaft.

Production Methods for Internal Drive Shafts
Once the material is selected, the manufacturing process begins with the shaping of the raw material into the desired form. This may involve cutting, milling, or turning the material to achieve the precise dimensions and tolerances required for the internal drive shaft. Computer-aided design (CAD) and computer-aided manufacturing (CAM) technologies are often employed to ensure the accuracy and consistency of the production process.
In some cases, advanced manufacturing techniques such as CNC (computer numerical control) machining or 3D printing may be utilized to create complex geometries and intricate designs for internal drive shafts. These methods allow for the production of drive shafts with precise features and tight tolerances, ensuring optimal performance within the optical instrument.
Quality Control Measures
Throughout the manufacturing process, stringent quality control measures are implemented to verify the integrity and performance of the internal drive shafts. This includes dimensional inspections, material testing, and surface finish evaluations to ensure that the drive shafts meet the specified requirements.
Advanced metrology tools such as coordinate measuring machines (CMMs) and optical inspection systems are used to verify the dimensional accuracy of the drive shafts, while non-destructive testing methods such as ultrasonic testing or eddy current testing may be employed to detect any internal defects or irregularities.
In addition to physical inspections, manufacturers may also conduct performance testing to evaluate the functional characteristics of the drive shafts. This may involve subjecting the drive shafts to simulated operating conditions to assess their reliability, precision, and resistance to wear and fatigue.
Application of Surface Treatments and Coatings
To further enhance the performance and longevity of internal drive shafts, manufacturers may apply surface treatments and coatings to the components. These treatments can improve the wear resistance, corrosion resistance, and lubricity of the drive shafts, ensuring smooth operation and minimal maintenance requirements within the optical instrument.
Common surface treatments for internal drive shafts include electroplating, anodizing, and chemical passivation, which can provide a protective barrier against environmental factors and mechanical wear. Additionally, specialized coatings such as PVD (physical vapor deposition) or DLC (diamond-like carbon) coatings may be applied to further enhance the surface hardness and friction properties of the drive shafts.
Conclusion
The manufacturing process of internal drive shafts for optical instruments involves a combination of advanced materials, precision production methods, and rigorous quality control measures to ensure the highest standards of performance and reliability. By carefully selecting materials, employing advanced manufacturing techniques, and implementing thorough quality assurance processes, manufacturers can produce internal drive shafts that meet the demanding requirements of modern optical instruments.
The continuous advancement of manufacturing technologies and materials science will further drive innovation in the production of internal drive shafts, leading to improved performance, reduced lead times, and enhanced cost-effectiveness for optical instrument manufacturers. As the demand for high-precision optical instruments continues to grow across various industries, the manufacturing process of internal drive shafts will remain a critical aspect of ensuring the functionality and longevity of these essential components.
Rui Pu Luo is an excellent internal drive shafts for optical instruments supplier. We will provide you with high-quality products and excellent services. Welcome to come for consultation at any time.
https://www.rplmachining.com/Manufacturing-process-of-optical-instrument-internal-drive-shafts.html
Rui Pu Luo
ruipuluo_wyh2017@163.com